Hogwarts Legacy has everything that every Harry Potter enthusiast has been longing for. With a gorgeous, extensively explorable magical open-world full of life and all types of Fantastic Beasts as well as secret puzzles, riddles, challenges, and side quests, fans can finally live their ultimate Wizarding World fantasy in Avalanche Software’s most polished action RPG.
But, like everything else in life, Hogwarts Legacy, too, isn’t flawless. The game lacks an essential element that, in my opinion, is crucial for any open-world game in this day and age (other than good optimization and performance). Yes, what I’m referring to is a fully functional Photo Mode. It’s almost unbelievable that the developers chose not to include this feature in a game as beautiful as this love letter to all Potterheads!
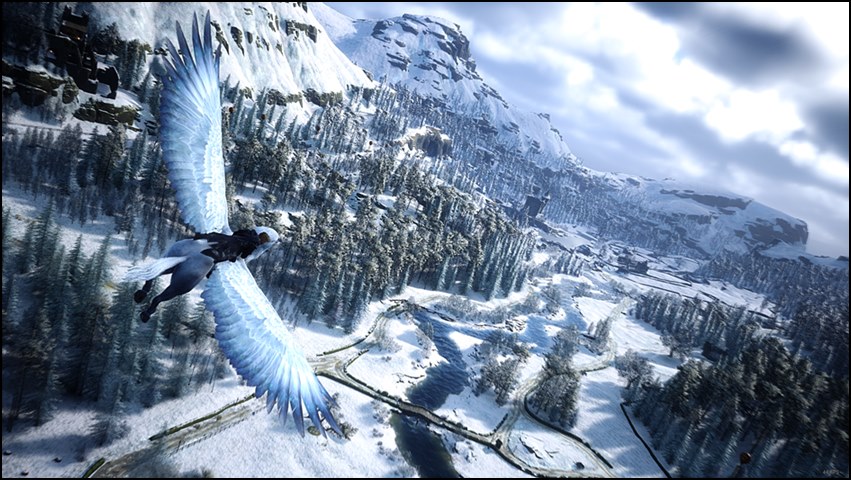
So, I went ahead and found a workaround. This Gamer Haul guide will teach you how to level up your Hogwarts Legacy screenshotting game from this:
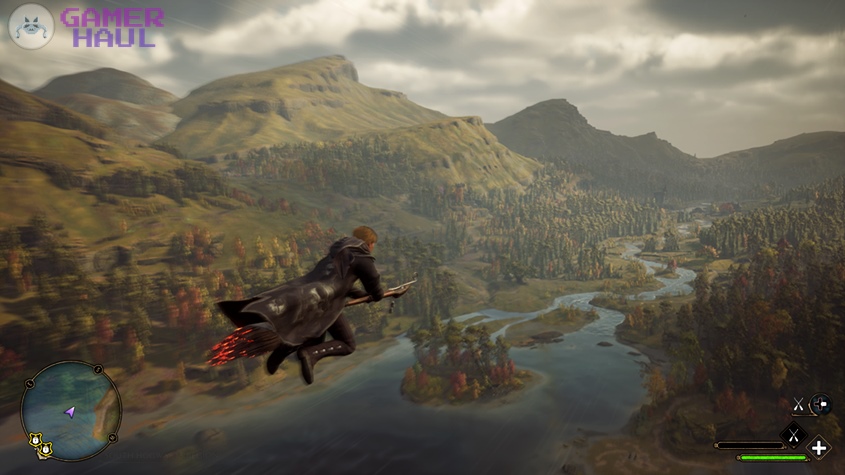
To this:
How to Shoot Better Hogwarts Legacy Screenshots on PC With NVIDIA Ansel
Ansel is NVIDIA’s ultimate solution for games that lack a photo mode, and if you own an NVIDIA Graphics Card that can run Hogwarts Legacy, it most likely supports Ansel as well. Here’s the step-by-step on how to take the ultimate screenshot to show off on social media or feature in your Steam Profile using NVIDIA Ansel on PC:
- STEP 1: Download and install the latest version of GeForce Experience. You’ll also want to update your graphics drivers if you’re running an outdated version.
- Visit the official NVIDIA website to manually search and download the correct drivers.
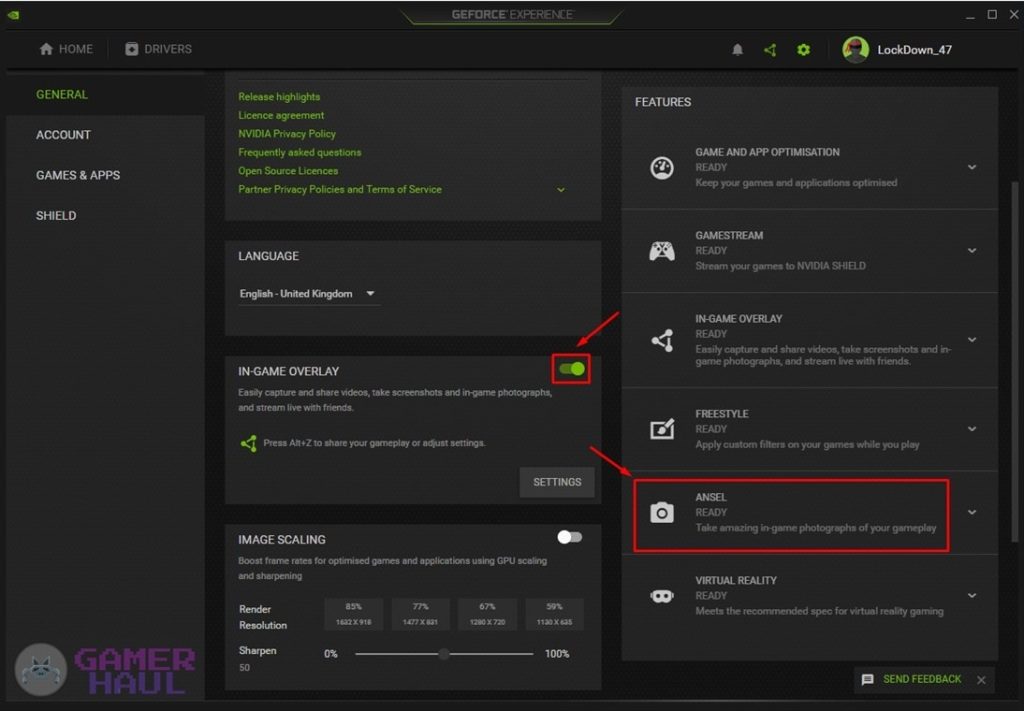
- STEP 2: Log in to GeForce Experience and open up ‘Settings’ by clicking on the gear icon on the top right.
- STEP 3: Make sure In-Game Overlay is turned on and ANSEL is READY.
- STEP 4: Launch Hogwarts Legacy and find a good scene in the daytime to test the photo mode out.
- STEP 5: Open up the GeForce Experience In-Game Overlay (Alt+Z by default) and click ‘Photo Mode’
- Alt+F2 is the default shortcut for NVIDIA Photo Mode.
- STEP 6: Clicking Photo Mode will instantly take a screenshot and provide you with various options to modify the scene you captured. Inside this window, you will find options such as ‘Camera’ that lets you increase (or decrease) the Field of View and many filters to apply to the image. You can even use your mouse or controller to pan and adjust the camera angle.
- Here are my presets:
- Game Engine
- High Quality: ON
- Bloom: OFF
- Filter #1: Details
- Sharpness: +50
- Clarity: +20
- HDR Toning: -30
- Filter #2: Color
- Vibrance: +40
- Filter #3: Brightness / Contrast
- Exposure: -5
- Contrast: +40
- Highlights: +20
- Shadows: +50
- Game Engine
- Here are my presets:
- STEP 7: Tinker with these settings until you find your sweet spot!
- STEP 8: Click on the Snap button to save the image.
- You can find this screenshot in the Gallery inside the GeForce Experience Overlay.
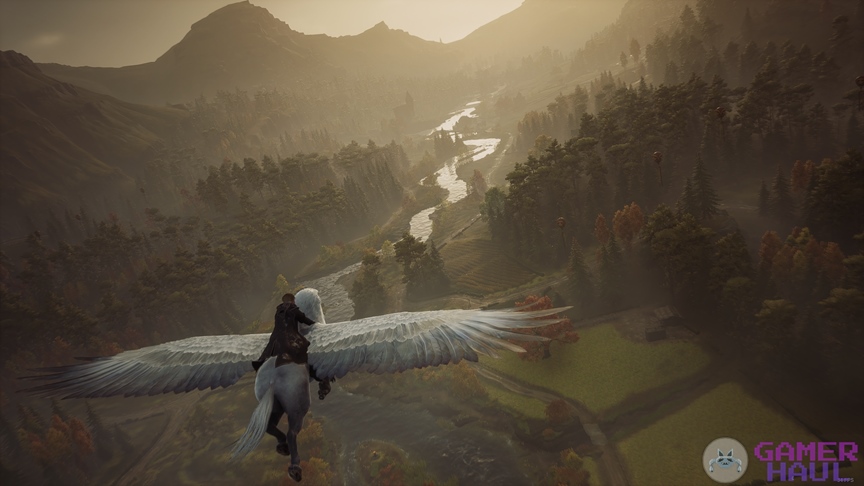
Here are a few more Hogwarts Legacy screenshots I captured, courtesy of NVIDIA Ansel!


And that’s how you snap professional-grade screenshots in a game that doesn’t even have a Photo Mode. Let us see some of yours in the comments below!
Check out the other Hogwarts Legacy guides by clicking here!
Hogwarts Legacy is available now on PlayStation 5, Xbox Series X|S, and PC; and scheduled for release on April 4, 2023, on PlayStation 4 and Xbox One, and July 25, 2023, on Nintendo Switch.